Ever created a Unity script and wondered why some values show up in the Inspector while others don’t? Or maybe you tried to tweak a variable during play mode but couldn’t figure out why the change didn’t stick?
If you experience something similar, then you might learn about Unity variables. Let’s make it easy for you with this simple guide.

What Are Variables in Unity?
Variables are named containers that store data for your scripts. In Unity, they are defined using the C# language, but the engine adds an extra layer of flexibility by integrating many of them with the Inspector.
This means you can both control them through code and adjust their values directly in the Unity Editor. Every variable has three key parts:
- data type: Defines the kind of data it can hold, such as numbers, text, or references to objects.
- name: Identifies the variable so you can use it in your code.
- access level: Determines where and how the variable can be used, such as only inside its own script or from other scripts.
By storing and manipulating data through variables, you can control nearly every aspect of your game, from tracking scores to moving objects to controlling gameplay states.
Declaring and Initializing Variables
A variable is created in two steps: declaring it and, optionally, initializing it with a value. In C#, the syntax looks like this:
// Declaration
int score;

// Declaration with initialization
int score = 100;- Declaration tells Unity the variable’s type and name.
- Initialization assigns a value to that variable at the time of creation.
Here are examples of common types you’ll use in Unity:
- int for whole numbers like scores, ammo counts, or levels.
// Whole number
int health = 100;- float for decimal values such as movement speed, jump height, or time intervals.
// Decimal number
float speed = 5.5f;- bool for true-or-false states, such as whether a door is open or a player is alive.
// True or false
bool isAlive = true;- string for text values like player names, UI messages, or file paths.
// Text
string playerName = "Hero";Tip: Floats in Unity require an f at the end of the value. Without it, Unity will throw an error because the number defaults to a double.
Declaring variables like this lets you store the values your script needs to function. You can also update these values later in the script as your game logic changes.
Tip: Unity’s serialization has limitations. For example, dictionaries, generic collections of non-serializable types, or interfaces won’t show in the Inspector unless you write a custom editor or serialization handler.
Public vs Private Variables
In Unity, the way you declare a variable determines where it can be accessed and whether it appears in the Inspector. Understanding the access levels ensures that your scripts remain clean and maintainable, while still giving you the flexibility to test and adjust values quickly during development.
The two most common are public and private.
A public variable can be accessed from other scripts and is automatically visible in the Inspector. This is helpful when you want designers or other team members to adjust values without touching the code. For example:
public float speed = 5f;A private variable, on the other hand, is restricted to the script where it is declared and does not show up in the Inspector by default. Private variables are useful when you want to keep internal logic hidden:
private int score = 0;If you want a variable to remain private but still editable in the Inspector, you can use the [SerializeField] attribute. This keeps the variable encapsulated in your code while still exposing it for tweaking in the Editor:
[SerializeField] private int health = 100;Similarly, if you need a public variable but want to hide it from the Inspector, you can use [HideInInspector]. This keeps it accessible to other scripts but invisible in the Editor.
Note: Static fields won’t appear in the Inspector, even if they are declared as public. Unity doesn’t serialize static data because it isn’t tied to a specific instance of a GameObject.
Specialized Types in Unity
Along with basic data types, Unity provides specialized types that make it easier to work with objects, positions, and physics in your game. These types are built into the engine and are used in almost every project, from simple prototypes to complex systems.
Let’s have a quick look at each.
Vector2 is used for storing positions and directions in 2D space. For example, you can store a character’s location like this:
Vector2 position = new Vector2(5f, 10f);Vector3 is similar, but for 3D coordinates. It’s useful for things like setting spawn points or moving objects in a scene:
Vector3 spawnPoint = new Vector3(0f, 2f, 5f);Quaternion represents rotations in 3D space. Instead of manually handling angles, you can store and apply rotations using quaternions:
Quaternion rotation = Quaternion.Euler(0f, 90f, 0f);Transform references an object’s position, rotation, and scale, making it easy to move or rotate objects in your script:
transform.position = new Vector3(1f, 1f, 1f);Rigidbody connects your script to Unity’s physics engine, letting you add realistic movement or collision responses:
Rigidbody rb = GetComponent<Rigidbody>();
rb.AddForce(Vector3.up * 5f, ForceMode.Impulse);
These specialized types save time and help you interact with your game world efficiently, without having to write complex math or physics code yourself.
Editing Variables in the Inspector
The Inspector is more than a readout. It is a fast way to test and debug. Any public or private variable marked with [SerializeField] appears automatically in the Inspector. You can tweak values during Play Mode and see results instantly.
For demonstration, we created a 3D Sphere in the scene and attached this script to it:
using UnityEngine;

public class VariableDemo : MonoBehaviour
{
    [SerializeField] private float moveSpeed = 5f;   // Editable in Inspector, kept private for encapsulation
    [SerializeField] private Color objectColor = Color.red; // Color picker appears in Inspector
    public string objectName = "Demo Sphere";        // Public, visible and editable in Inspector

    private Renderer sphereRenderer;

    void Start()
    {
        sphereRenderer = GetComponent<Renderer>();   // Cache the Renderer once
        sphereRenderer.material.color = objectColor; // Apply the chosen color at startup
        gameObject.name = objectName;                // Rename the GameObject from Inspector value
    }

    void Update()
    {
        // Move the sphere forward at moveSpeed units per second
        transform.Translate(Vector3.forward * moveSpeed * Time.deltaTime);
    }
}
It exposes three variables in the Inspector. moveSpeed and objectColor are private but marked with [SerializeField], so you can edit their values in the Inspector while keeping the fields encapsulated in code. objectName is public, making it accessible from other scripts and editable in the Inspector as well.
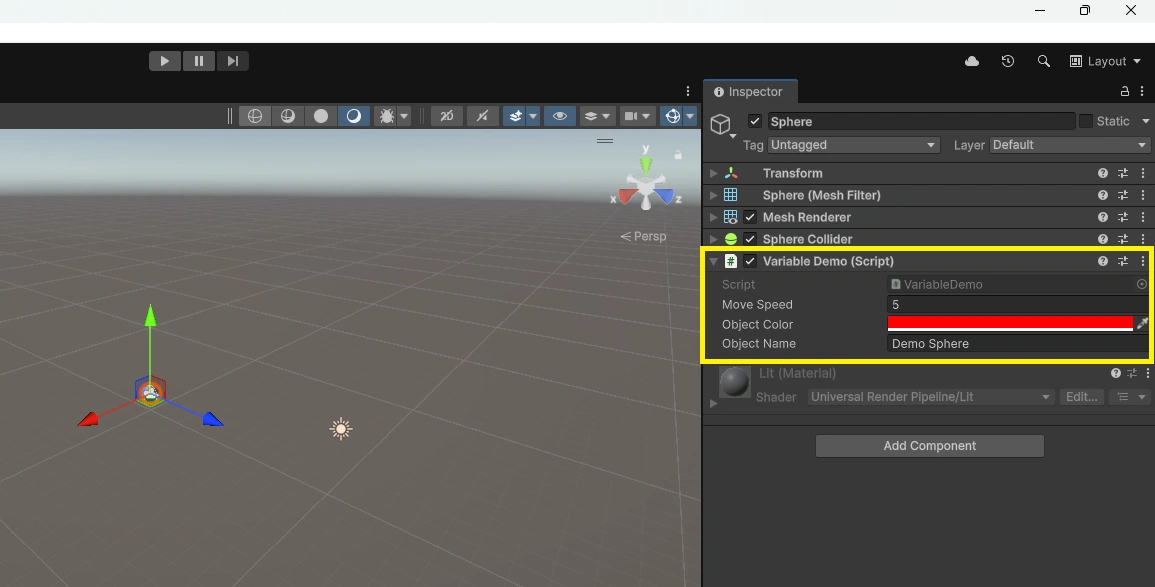
This small example shows how variables can control different aspects of an object. Its movement, color, and name, all without editing the script each time.
Note: Changes you make in the Inspector during Play Mode are temporary. They reset when you exit Play Mode unless you manually copy the values.
Wrapping Up
Variables are the foundation of Unity scripting, powering everything from basic object behaviors to complex game systems. The more confidently you understand and use them, the easier it becomes to build clean, maintainable code that works well with the Unity Editor.
As a best practice:
- Use clear, descriptive names so your code is easy to understand.
- Keep variable scope minimal, exposing only what needs to be accessible.
- Use serialization thoughtfully instead of exposing every field to the Inspector.
- Keep scripts organized and clutter-free for easier debugging and updates.
Experimenting with different variable types and Inspector settings is the fastest way to build confidence. The more you explore, the better you’ll understand which approaches fit your project’s needs.