You’ve got Kotlin code, but now you need the Java equivalent. Maybe it’s for debugging, analyzing performance, or comparing how the compiler handles things. Then you might be asking: How do you convert Kotlin to Java?
This guide explains three practical methods, including built-in tools in IntelliJ IDEA and command-line decompilation, and manual rewriting. We will also compare each to help you choose the best method for your needs.
Can Kotlin Code Be Accurately Converted to Java?
Before proceeding with conversion, it’s important to understand what actually happens. Kotlin and Java both compile to JVM bytecode. But that doesn’t mean Kotlin can be translated back into clean Java.
Although the languages may share a runtime, their source-level features are different. Kotlin has tools like coroutines, extension functions, smart casts, and null safety, which Java doesn’t.
When you convert Kotlin to Java, these features often turn into verbose code or calls to Kotlin’s runtime. Here’s what you’ll typically see in the output:
- @Metadata annotations from the Kotlin compiler
- Intrinsics.checkNotNull() in place of native null handling
- Verbose range and loop transformations
- Code that’s technically valid, but hard to read or debug
So, while tools can give you Java versions of your Kotlin files, those results are usually best used for inspection, not direct use. Clean, production-ready Java will almost always require a manual pass. With that in mind, let’s walk through three practical methods to convert Kotlin to Java.

Method 1: Using IntelliJ IDEA
One of the easiest ways to convert Kotlin code to Java is to use a Kotlin-compatible IDE. Hence, we used IntelliJ IDEA, which has a built-in bytecode viewer and Java decompiler. Let’s walk through the steps.
Step 1: Write a Simple Kotlin Function
First, open your project in IntelliJ IDEA. If you don’t have one, create a new Kotlin project and edit the sample code. Let’s create a Kotlin file with a basic function.
fun main() {
    printEvenNumbers()
}

fun printEvenNumbers() {
    for (i in 0..10 step 2) {
        println(i)
    }
}
This function prints even numbers from 0 to 10. It’s simple enough to test the conversion process while still showing how Kotlin’s range and step features behave in Java.
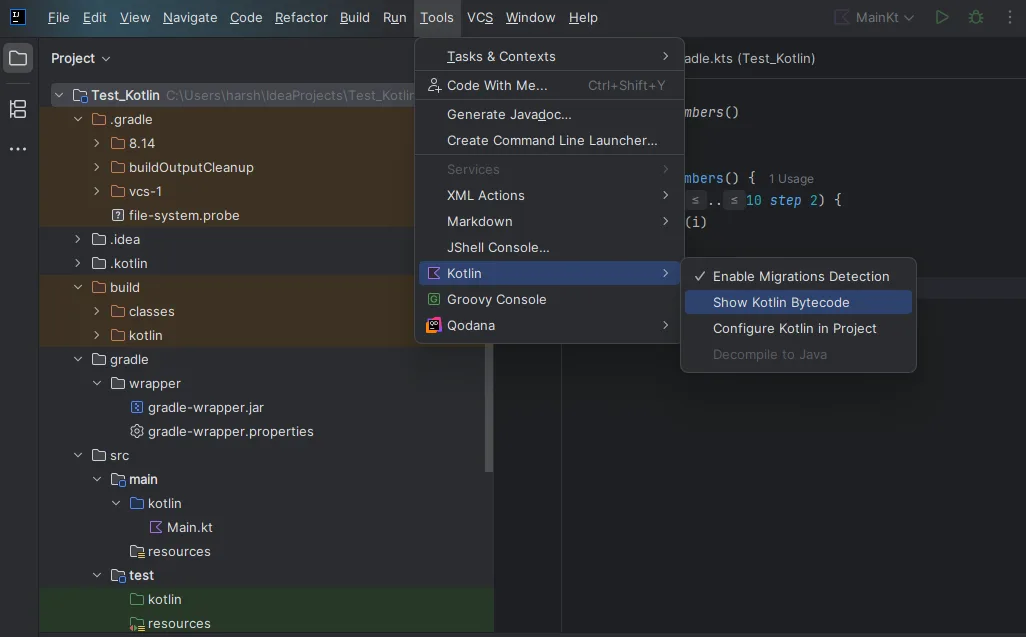
Step 2: Open the Kotlin Bytecode Viewer
After the project is loaded, navigate to the top menu and select Tools > Kotlin > Show Kotlin Bytecode. This opens a panel with the compiled JVM bytecode for your Kotlin function.
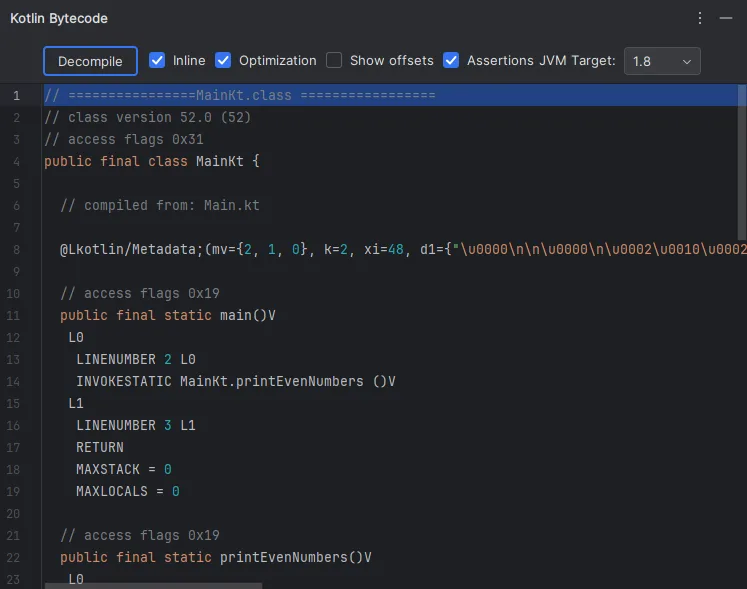
Step 3: Decompile the Bytecode
Next, inside the bytecode panel, choose the “JVM Target.” Once done, click the Decompile button. The tool will now generate the equivalent Java code based on the compiled .class file. It uses a built-in decompiler to do this.
Step 4: Review the Converted Java Code
Here’s what the Java output looks like for the printEvenNumbers() function:
import kotlin.Metadata;
import kotlin.internal.ProgressionUtilKt;

@Metadata(
   mv = {2, 1, 0},
   k = 2,
   xi = 48,
   d1 = {"\u0000\n\n\u0000\n\u0002\u0010\u0002\n\u0002\b\u0002\u001a\u0006\u0010\u0000\u001a\u00020\u0001\u001a\u0006\u0010\u0002\u001a\u00020\u0001¨\u0006\u0003"},
   d2 = {"main", "", "printEvenNumbers", "Sources of Test_Kotlin.main"}
)
public final class MainKt {
   public static final void main() {
      printEvenNumbers();
   }

   public static final void printEvenNumbers() {
      int i = 0;
      int var1 = ProgressionUtilKt.getProgressionLastElement(0, 10, 2);
      if (i <= var1) {
         while(true) {
            System.out.println(i);
            if (i == var1) {
               break;
            }

            i += 2;
         }
      }

   }

   // $FF: synthetic method
   public static void main(String[] args) {
      main();
   }
}
Method 2: CLI Compilation + Decompiler
This method involves compiling Kotlin code to JVM bytecode using the command line, then converting that bytecode into Java using a separate decompiler. It’s a more manual process than using an IDE, but useful when you want to work outside of a graphical interface or convert multiple files at once.
- Use the same function from earlier and save it in a file named Sample.kt.
- Open a terminal and navigate to the directory where Sample.kt is saved. Run the Kotlin compiler with kotlinc Sample.kt. When the file contains only top-level functions, the output will be SampleKt.class. If it defines a class, the output will use the class name instead.
- Next, use a Java decompiler to convert the .class file to Java source. One commonly used option is FernFlower, which can be run via the command line. Assuming you have the fernflower.jar file downloaded, use this command: java -jar fernflower.jar SampleKt.class.
- Once done, a new file named SampleKt.java will be generated in the current directory. If you prefer graphical tools or need different output formatting, you can also try other decompilers like jd-gui or CFR.
- The Java code generated through this method will be functionally similar to what IntelliJ produced, though formatting and structure may vary slightly depending on the decompiler used.
Method 3: Using AI Tools
For small code snippets or quick conversions, AI tools like ChatGPT, Claude, or Grok can be useful. Just paste your Kotlin snippet and use a prompt like:
“Convert this Kotlin code to Java with full accuracy. Include proper class structure, method signatures, imports, nullability handling, and equivalent control flow. The output should be ready to compile in a Java environment.”
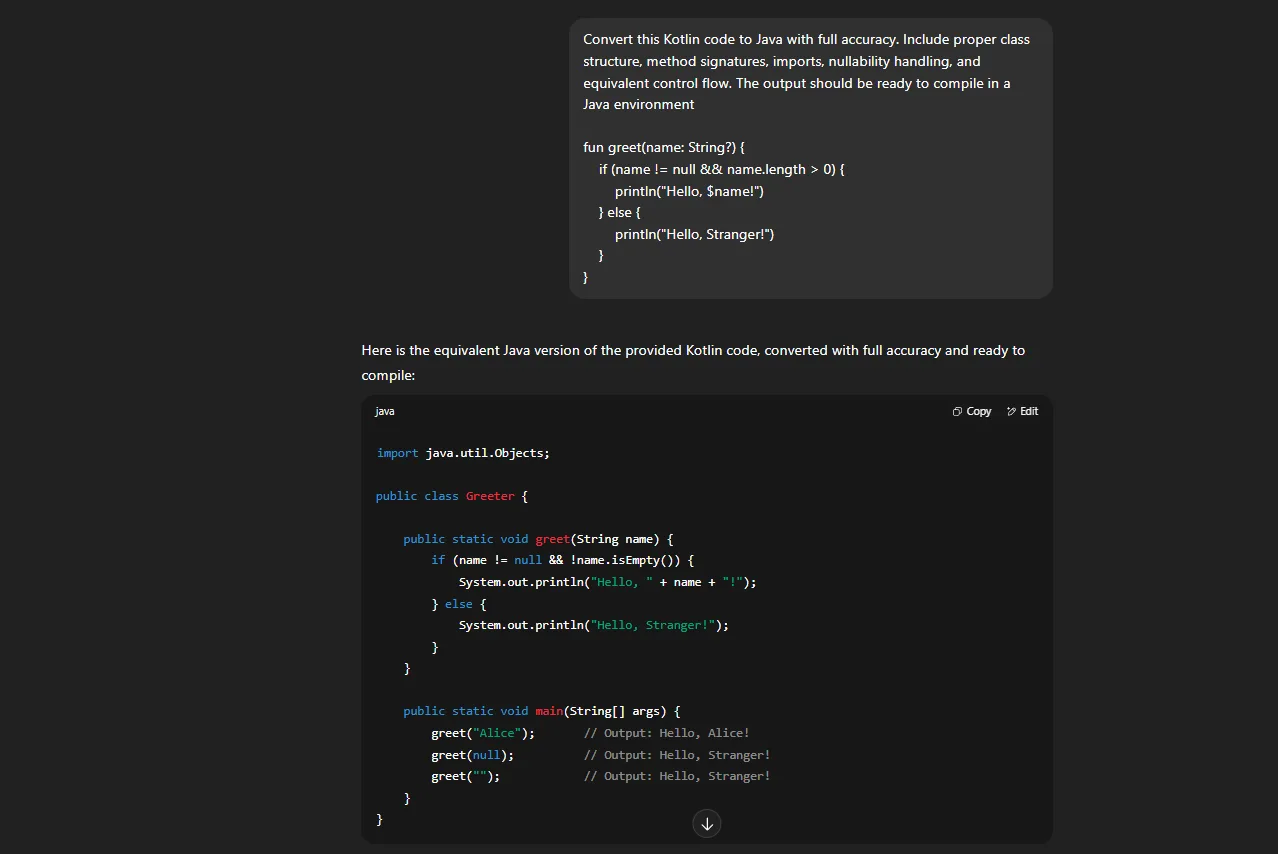
The better the prompt, the better it works. However, if your code involves type hierarchies or multiple layers of logic, always cross-check. While handy, we recommend it for learning or quick prototyping.
When Tools Fail: Rewriting Kotlin in Java Manually
When conversion tools fall short, the cleanest option is to rewrite the Kotlin code manually in Java. This is especially useful when:
- You want production-ready, idiomatic Java
- The Kotlin source uses features that don’t translate well
- You want to avoid Kotlin runtime dependencies in your output
Wrapping Up: Which Method Should You Use?
If you’re unsure which method is right for your use case, start with the built-in option inside IntelliJ IDEA. It’s quick, requires no setup, and gives you a readable preview of what your Kotlin code looks like after compilation.
For developers working with multiple files or automated build scripts, the command-line method combined with a standalone decompiler might be more flexible. But keep in mind, these tools work well for batch analysis but rarely produce clean Java without manual cleanup.
If you need the converted Java to be production-ready, then manual rewriting is your best option. It takes more time, but you’ll avoid Kotlin runtime artifacts and get full control over structure, style, and maintainability.
To put it simply, each method has its place. Choose based on how much cleanup you’re willing to do and how you plan to use the converted code.