How to Set up Continuous Testing for Android App Development

As Android apps become more popular, it’s essential to ensure they’re free of bugs and work smoothly. This is where Continuous Integration (CI) and Continuous Testing (CT) can help. CI helps developers catch code issues early by merging updates regularly into a shared repository. CT builds on this by running automated tests every time there’s a new code change, helping ensure that updates are safe before they reach users.
Continuous testing is essential for Android because of the wide range of devices, screen sizes, and OS versions. With a good testing setup, you can be confident your app will work well across these different environments, leading to fewer bugs and a better user experience. Unit Tests and Connected Tests (Instrumented Tests) are the most common tests used in software development. While unit tests focus on isolated code, connected tests comprehensively validate app behavior, UI elements, databases, and network layers.
However, setting up continuous testing for Android can be challenging. Should you do unit tests only or instrumented tests? Is instrumented testing on a simulator enough or do you need to test on real physical devices? Which ones? How to set up and manage that fleet? Do you set it up in-house or use existing platforms? In this guide, we will start diving into the world of Android CI by first creating a basic testing pipeline using GitHub Actions and connected tests using a Simulator. We will also show how Bugsee’s crash reporting tools can help you automatically track issues detected by the setup. In future articles, we’ll expand on the idea and dive into more advanced topics of device clouds and building the tests themselves.
Pros/Cons of various Continuous Integration and Testing options
There are several tools to consider when setting up Continuous Integration and Continuous Testing for an Android app. Let’s take a look at some popular options:
| Tool | Description | Key Features | Pros | Cons |
| GitHub Actions | Integrated CI/CD for GitHub | Customizable workflows, easy integration | User-friendly, ideal for smaller projects | Fewer built-in analytics |
| CircleCI | Cloud-based CI/CD platform | Automation of pipelines and assist with parallel testing. | Efficient and scalable constructions, along with customizable options. | Intricate setup and a sparse free tier. |
| Bitrise | Mobile-focused CI/CD | Pre-formed workflows along with wide integrations | A great UI for mobile projects, one that is intuitive | Costly for advanced features |
| Jenkins | Automation server for CI/CD that is open-source | Automates build, test, and deployment through the use of plugins. | Highly modifiable, available for no charge, applicable on any platform | Requires more maintenance |
| GitLab CI | Built-in CI/CD with GitLab | Takes care of building, testing, and deployment | Compatible for easy integration with GitLab and collaborative. | Limited free resources |
| Appium | Automated mobile testing that is open-source | Has Android, iOS, and web app supports | Multichannel, puncturable, no code necessary modifications. | A slower execution for intricate applications |
While each tool has its strengths, according to a survey conducted by JetBrains, GitHub Actions has become the most popular CI/CD tool overall, particularly for personal projects. It integrates seamlessly with GitHub’s ecosystem, has strong community support, and makes it easy to configure automated workflows. In this guide, we’ll learn how to set up continuous testing for your Android app using GitHub Actions.
Setting Up Continuous Testing for Android Apps in GitHub Actions
Prerequisites
The following tutorial assumes you already have:
- An Android app repository on GitHub;
- Basic knowledge of YAML for creating GitHub Actions workflows;
- An Android app project ready for testing;
- A set of written unit and/or instrumented tests implemented that successfully run locally from a command line (i.e ./gradlew test and ./gradlew connectedCheck respectively)
Step 1: Connect Your Project to GitHub
- Open your Android project in Android Studio.
- Go to VCS > Turn On Version Control Integration and select Git.
- Push your project to a GitHub repository by using VCS > Git > Push or the terminal.
Step 2: Create a GitHub Actions Workflow
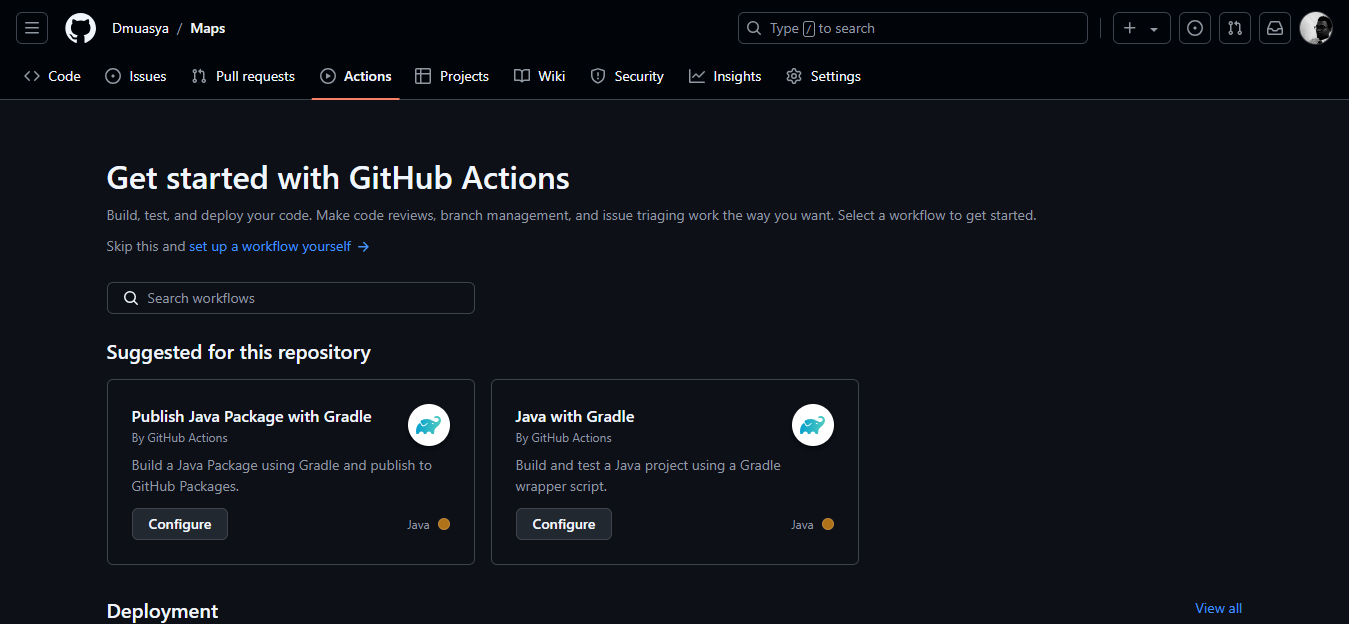
- In your GitHub repository, go to the Actions tab.
- Select Set up a workflow yourself or choose a ready-made template for Android CI/CD.
Step 3: Configure the Workflow for unit tests
- In your repository, create a YAML file named gradle.yml in the .github/workflows directory.
Add the following code to define your CI process:
name: Android CI

on:
  push:
    branches: [ "master" ]
  pull_request:
    branches: [ "master" ]

jobs:
  build:

    runs-on: ubuntu-latest

    steps:
    - uses: actions/checkout@v4
    - name: set up JDK 11
      uses: actions/setup-java@v4
      with:
        java-version: '11'
        distribution: 'temurin'
        cache: gradle

    - name: Grant execute permission for gradlew
      run: chmod +x gradlew

    - name: Build with Gradle
      run: ./gradlew build

    - name: Run Unit Tests
      run: ./gradlew test
This workflow will run whenever you push or make a pull request to the main branch. It checks out the code, sets up Java, gives gradle permission, builds the project, and runs unit tests.
Step 4: Run Instrumented Tests
To include UI tests in the workflow, set up an Android Emulator runner and configure the environment to support connected Android tests. This process involves several steps to ensure the emulator runs effectively and tests execute smoothly. In the example below we use ReactiveCircus/android-emulator-runner@v2 action to set up an Android Emulator and execute the connected test.
- name: Run Start Emulator
uses: ReactiveCircus/android-emulator-runner@v2
with:
api-level: 30 # Specify API level of the emulator
target: google_apis # Set target to google_apis
arch: x86_64 # Specify architecture
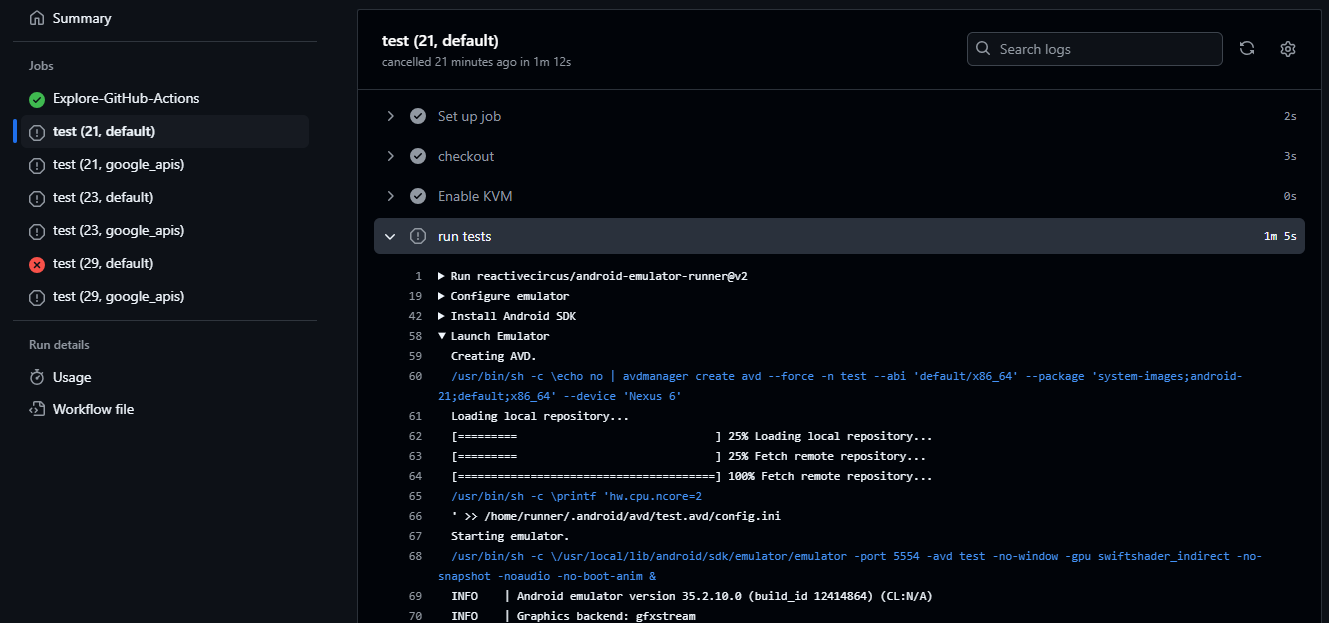
script: ./gradlew connectedCheck # Command to run connected testsThis example, this utilizes a build matrix to run the instrumented test on multiple configs:
test:
    runs-on: ubuntu-latest
    strategy:
      matrix:
        api-level: [21, 23, 29]
        target: [default, google_apis]
    steps:
      - name: checkout
        uses: actions/checkout@v4

      - name: Enable KVM
        run: |
          echo 'KERNEL=="kvm", GROUP="kvm", MODE="0666", OPTIONS+="static_node=kvm"' | sudo tee /etc/udev/rules.d/99-kvm4all.rules
          sudo udevadm control --reload-rules
          sudo udevadm trigger --name-match=kvm

      - name: run tests
        uses: reactivecircus/android-emulator-runner@v2
        with:
          api-level: ${{ matrix.api-level }}
          target: ${{ matrix.target }}
          arch: x86_64
          profile: Nexus 6
          script: ./gradlew connectedCheck
Key Considerations for Setting Up UI Tests:
- Emulator Boot Time: The emulator may take several minutes and the action will wait until the emulator is fully booted. Logs show the emulator’s status as “device offline” or “boot completed”.
- Environment: This configuration runs on ubuntu-latest to support the emulator setup. GitHub Actions supports selecting different OS runners, including Ubuntu and MacOS to suit various setup needs.
- API Level and Architecture: Choose API levels and architectures compatible with your app’s requirements.
Refer to this documentation or tutorial for more details on setting up an emulator in GitHub Actions.
Integrating with External Testing Services
As mentioned before, the setup above performs instrumented tests using a simulator. To run tests on a real device, you would want to use one or more device clouds, such as Firebase Test Lab, AWS Device Farm, or Azure DevTest Labs. These platforms provide access to a variety of devices for broader testing. Integrating with external testing services can help ensure your app works across different devices and configurations. GitHub actions eco-system allows creating such a setup and this will be one of the topics we will expand on in our Android testing series of articles.
Using Bugsee for Crash Reporting
When testing UI and UX, Bugsee is invaluable for tracking crashes and reporting a range of issues. It records conditions leading to problems, making it easy to pinpoint and fix them. Bugsee also provides video evidence during tests, helping developers quickly identify issues.
Bugsee is compatible with Android emulators and thus can be utilized in the setup we’ve created above using CI/CD environments like GitHub Actions, enabling it to capture crashes, logs, and user interactions even in a simulated environment. Developers can also explicitly report issues from the code, marking specific points for closer monitoring, even if no crash occurs.
Steps to Add Bugsee for UI Testing
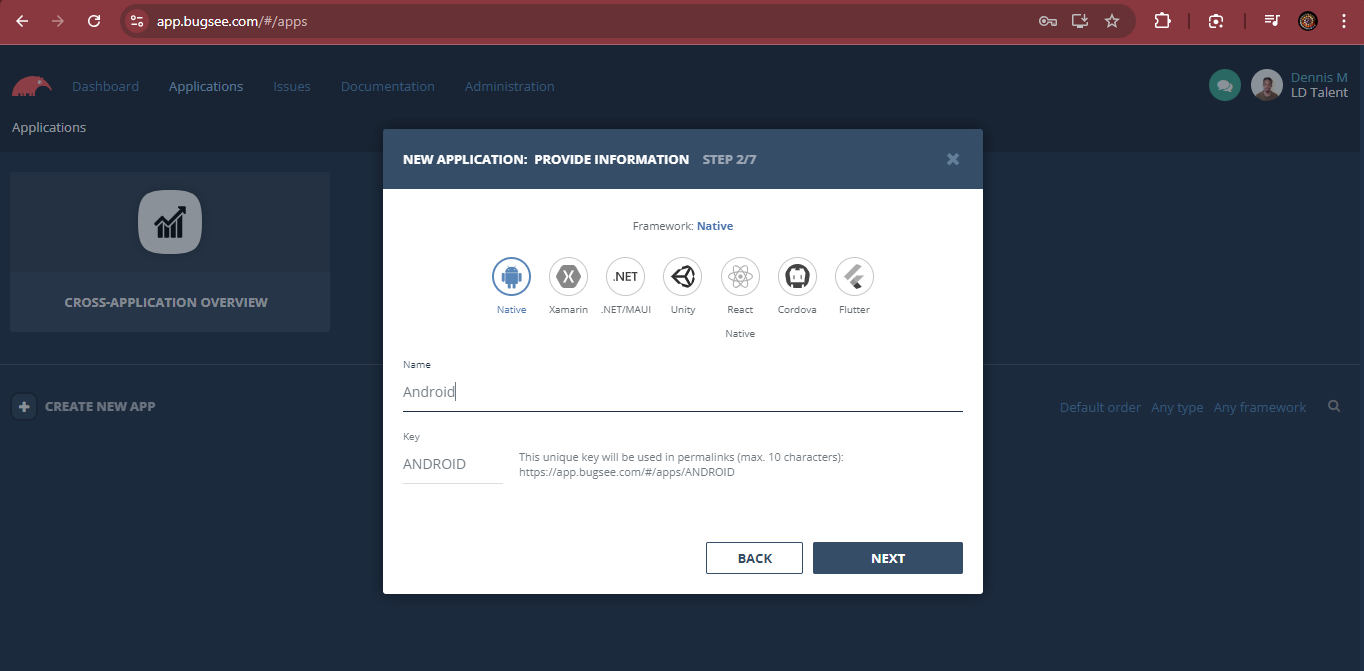
1. Sign Up and Register Your App
Start by signing up on Bugsee’s website. Once signed in, register your Android app to receive a unique app token.
2. Add Bugsee to Your Project
Add the Bugsee SDK to your build.gradle file:
dependencies {
    implementation 'com.bugsee:bugsee-android:4.+'
}
3. Initialize Bugsee in your MainActivity:
import com.bugsee.library.Bugsee


class MyApplication : Application() {
    override fun onCreate() {
        super.onCreate()
        Bugsee.launch(this, "<your_app_token>")
    }
}
Finally, commit and push the changes to the same branch on GitHub to include Bugsee in the CI pipeline to capture test crash data.
When running connected tests on an emulator or real device, Bugsee automatically logs crashes, interactions, and other diagnostic data. This integration allows you to debug issues detected during testing. Ensure that your connected test workflow (as defined in the YAML file) includes the necessary configurations for the Android Emulator
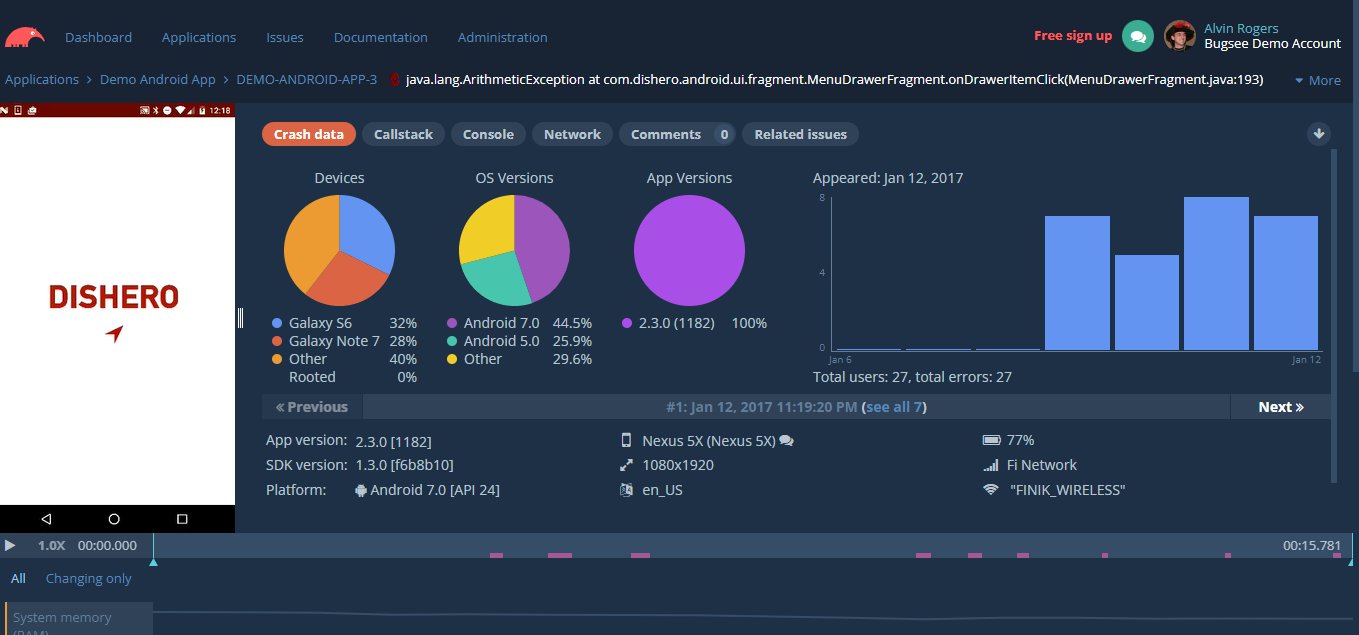
Analyze Crash Reports
To review crashes, go to Bugsee’s dashboard. You’ll find videos of the interactions that caused crashes and the exact actions that led to each issue, which is useful for tracking hard-to-replicate bugs.

Bugsee in Action: Improving UI Testing
Imagine a user navigating through screens and using different controls. Bugsee records everything leading up to a crash, allowing you to:
- Identify the screen and action where the crash happened
- Understand the sequence of actions that triggered the crash
- Use the data to optimize UI elements, fix layouts, or address gesture issues
In addition to providing insights and additional context for the crashes or errors, Bugsee does the smart grouping of similar crashes and provides additional analytics. It may become tough to track trends as your app evolves (observe how specific behaviors or crashes appear or disappear from one version to another), when testing with device clouds the insights may help identify early issues that happen only on a specific type of device or an OS version.
Conclusion
Continuous testing is a powerful way to ensure Android app quality, reduce bugs, and speed up development. By using GitHub Actions and Bugsee, you can build an efficient testing pipeline that keeps your app stable and delivers a better user experience. GitHub Actions automates testing and reporting, while Bugsee provides detailed crash data to quickly resolve issues, keeping your app stable for end users.